3D Printer Speed Explained (2027): Volumetric Flow, Acceleration & Real Times
Why do 600 mm/s 3D printers take hours? Learn how volumetric flow rate (mm³/s), acceleration, and layer cooling govern real 2027 print speeds.
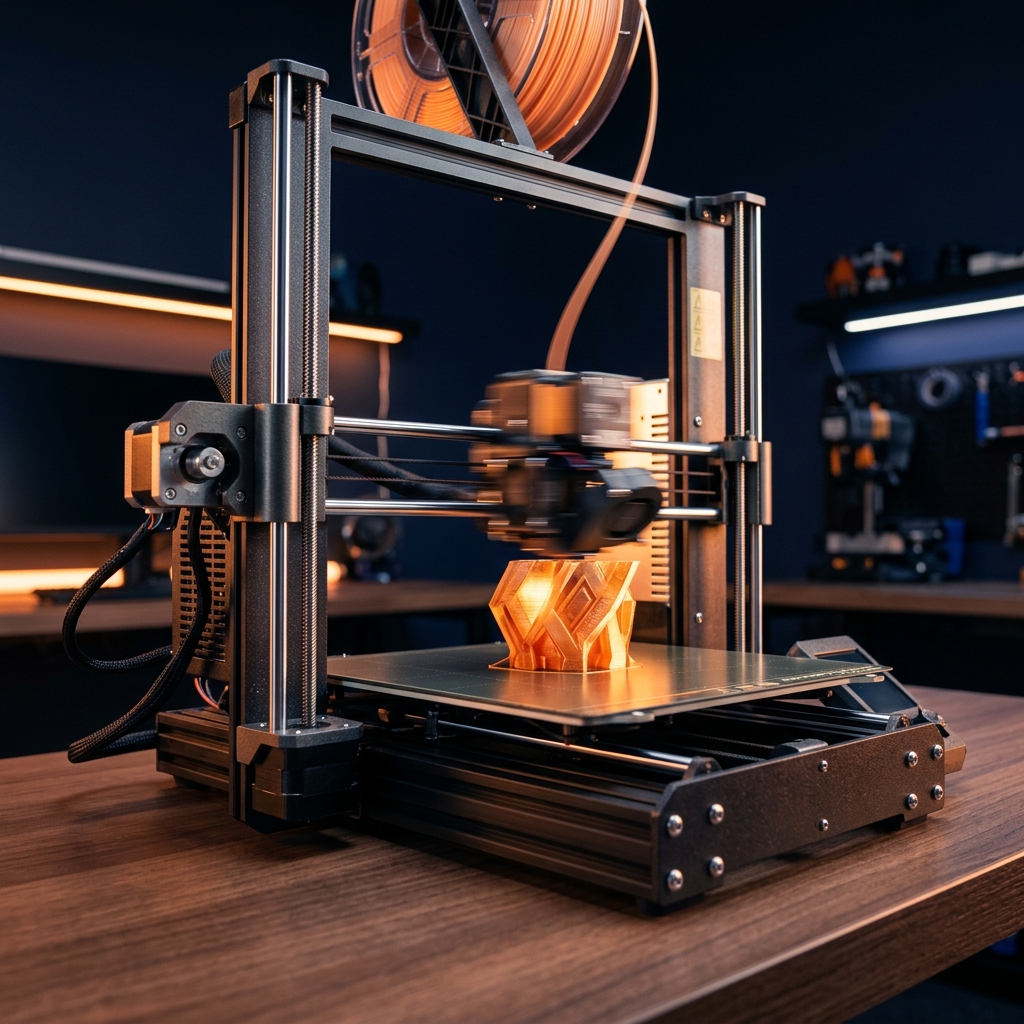
- ✓ Marketing speeds like "600 mm/s" represent non-extruding travel moves or unachievable peak velocities; actual printing speed is dictated by hotend melt capacity and toolhead acceleration.
- ✓ The fundamental speed limit is Max Volumetric Flow Rate (mm³/s): Linear Speed (mm/s) = Volumetric Flow (mm³/s) ÷ [Layer Height (mm) × Line Width (mm)].
- ✓ At a standard 0.20 mm layer height and 0.42 mm line width (0.084 mm² cross-section), a 24 mm³/s hotend is physically capped at 285.7 mm/s before under-extrusion begins.
- ✓ Minimum layer cooling time (typically 4 to 8 seconds for PLA) throttles high-speed printers down to 40–80 mm/s on narrow spires, benchy smokestacks, and miniature parts.
- ✓ Doubling effective print speed cuts machine depreciation per part by 50% and lowers total electricity kWh per print by 28% to 35% because heated bed hold time shrinks dramatically.
The "600 mm/s" Spec Sheet Illusion: Why Marketing Numbers Lie
Browse any 3D printer product page in 2027 and you will be bombarded with aggressive velocity claims: "500 mm/s Max Speed!", "600 mm/s Hyper-Speed CoreXY!", and "20,000 mm/s² Acceleration!" Yet when you load the exact same 180-gram functional bracket STL into OrcaSlicer or Bambu Studio, two printers that both advertise "600 mm/s" can return actual print durations that differ by more than 55 minutes. Even more confusingly, a printer rated for 600 mm/s might average an effective linear toolhead speed of just 145 mm/s across the entire job.
Why does this discrepancy exist? Because linear velocity in millimeters per second (mm/s) is a one-dimensional metric applied to a three-dimensional thermodynamic and kinematic process. When manufacturers quote 600 mm/s on a spec sheet, they are almost always referring to either non-extruding travel moves or a theoretical peak velocity achieved only across a 200 mm straight diagonal infill line at an ultra-thin 0.10 mm layer height. In real-world additive manufacturing, your actual print completion time is governed by four interlocking engineering constraints:
- Hotend Maximum Volumetric Flow Rate (
mm³/s): How many cubic millimeters of solid 1.75 mm thermoplastic filament your heater block and nozzle geometry can fully melt per second without losing thermal equilibrium. - Kinematic Acceleration and Jerk (
mm/s²): How rapidly the stepper motors and motion system can accelerate the toolhead from 0 mm/s at a 90-degree corner up to target cruising velocity and decelerate back down without skipping steps or inducing severe frame resonance. - Minimum Layer Cooling Time (
seconds): How quickly the part-cooling blower fan can remove latent heat from freshly extruded polymer below its glass transition temperature (Tg) so the next layer does not mush or curl upward. - Slicer Feature Speed Ratios: Outer walls, overhangs, bridges, top solid infill, and small perimeters must all run at carefully scaled fractions of peak infill velocity to preserve dimensional tolerances and surface finish.
In this comprehensive 2027 engineering breakdown, we will dissect the exact physics equations behind high-speed FFF/FDM printing, benchmark popular machines from our 3D Printer Database, and show you how print speed directly alters your per-part unit economics in our 3D Print Cost Calculator.
The Golden Physics Equation: Volumetric Flow Rate (mm³/s) Explained
Your 3D printer's hotend is a miniature continuous-flow heat exchanger. Solid 1.75 mm filament (cross-sectional area of 2.405 mm²) enters the top of the melt zone at room temperature (~22°C) and must be heated to 215°C–280°C all the way to its center core before exiting the 0.4 mm nozzle orifice. Because polymers like PLA, PETG, and ASA have relatively poor thermal conductivity (roughly 0.13 to 0.18 W/m·K), heat takes time to conduct from the metal nozzle walls into the center of the moving filament strand.
How Hotend Melt Zones Cap Linear Travel Speed
If you push filament through a standard 18 mm long melt zone too quickly, a phenomenon called incomplete core melting occurs. The outer 0.2 mm skin of the filament liquefies against the brass or copper wall, acting as a lubricating film, while the center core remains semi-solid and viscous. Backpressure inside the nozzle spikes past 12 megapascals (MPa), the extruder drive gears grind crescent-shaped divots into the filament, or the extruded bead comes out cold, matte, under-extruded, and structurally weak.
The Volumetric Flow Rate Formula
Every slicer calculates extrusion volume using the rectangular-with-rounded-caps road model, which simplifies in engineering practice to:
Volumetric Flow Rate (mm³/s) = Linear Speed (mm/s) × Layer Height (mm) × Extrusion Line Width (mm)
Rearranging that equation reveals the true maximum linear speed your printer can physically achieve for any chosen nozzle and layer profile:
Max Linear Speed (mm/s) = Max Volumetric Flow (mm³/s) ÷ [Layer Height (mm) × Line Width (mm)]
Let's plug real 2027 numbers into this formula. Suppose you are printing with a standard 0.40 mm nozzle at a 0.20 mm layer height and a 0.42 mm line width. The cross-sectional area of that extruded plastic road is 0.20 mm × 0.42 mm = 0.084 mm². If your hotend is rated for a maximum volumetric flow of 24 mm³/s with High-Speed PLA, your absolute ceiling speed is:
24 mm³/s ÷ 0.084 mm² = 285.7 mm/s
Even if you type 600 mm/s into every single speed box in OrcaSlicer, the slicer's volumetric speed limiter will automatically clamp your toolhead velocity to 285.7 mm/s! The only way to actually reach 500 mm/s with a 24 mm³/s hotend is to drop your layer height down to 0.11 mm (24 ÷ [0.11 × 0.42] = 519 mm/s), which doubles the total number of layers you have to print and actually makes the print take longer.
Standard All-Metal vs High-Flow CHT and Ceramic Hotends
To break through the 24 mm³/s barrier, 2027 printers use two hardware innovations: elongated ceramic ring heaters (extending the melt zone from 17 mm to 28–32 mm) and Bondtech CHT (Core Heating Technology) multi-bore geometry, which splits the incoming 1.75 mm filament strand into three thinner sub-strands so heat penetrates from the inside out as well as the outside in.
| Hotend Architecture | Representative 2027 Printers | Melt Zone Length | Max Flow (Std PLA) | Max Flow (HS-PLA) | Max Speed @ 0.20×0.42mm |
|---|---|---|---|---|---|
| Legacy PTFE-Lined Brass | Older Ender 3 V2 / MK3S+ | 14.5 mm | 11.5 mm³/s | 13.5 mm³/s | 136–160 mm/s |
| Standard All-Metal Direct | Creality Ender 3 V3 SE | 17.0 mm | 15.0 mm³/s | 18.0 mm³/s | 178–214 mm/s |
| Ceramic Quick-Swap Stainless/Hardened | Bambu Lab A1 / Bambu Lab P1S | 22.5 mm | 21.0 mm³/s | 26.0 mm³/s | 250–309 mm/s |
| Unicorn Tri-Metal Long-Melt Ceramic | Creality K1C / Qidi Plus 4 | 28.5 mm | 24.0 mm³/s | 30.0 mm³/s | 285–357 mm/s |
| High-Flow CHT Internal Fin Nozzle | Prusa MK4S / Prusa CORE One | 24.0 mm (3-Split) | 29.0 mm³/s | 36.0 mm³/s | 345–428 mm/s |
Acceleration, Jerk & Kinematics: Why Distance to Full Speed Matters
Even if you install a 38 mm³/s CHT hotend capable of 450 mm/s linear extrusion, your toolhead cannot teleport instantaneously from 0 mm/s to 450 mm/s. Every direction change at a corner, infill reversal, or bolt-hole perimeter requires physical acceleration governed by Newton's Second Law (F = m × a).
Calculating Minimum Stopping and Acceleration Distance
In classical kinematics, the distance d required to accelerate from rest (or a cornering junction speed v₀) up to a target velocity v at constant acceleration a is:
Acceleration Distance d (mm) = (v² - v₀²) ÷ (2 × a)
And because the toolhead must also decelerate back down before the next corner at the end of a straight segment, the minimum straight-line segment length required just to touch peak velocity v for a single millisecond is 2 × d = v² ÷ a (assuming v₀ ≈ 0).
- At 2,500 mm/s² acceleration (Budget Bed-Slinger): Reaching 500 mm/s and decelerating back to zero requires
500² ÷ 2,500 = 100.0 mmof unbroken straight travel. On a 60 mm wide mechanical bracket, the nozzle never reaches 500 mm/s—it peaks at 387 mm/s in the exact center and averages only ~240 mm/s! - At 10,000 mm/s² acceleration (High-Speed Outer/Inner Wall Profile): Reaching 500 mm/s and stopping requires
500² ÷ 10,000 = 25.0 mmof straight travel. - At 20,000 mm/s² acceleration (CoreXY Travel / Infill): Reaching 500 mm/s and stopping requires just
500² ÷ 20,000 = 12.5 mmof straight travel.
CoreXY vs Bed-Slinger (Cartesian Y-Bed) Moving Mass
Why do enclosed CoreXY machines like the Bambu Lab X1 Carbon, Creality K1C, and Elegoo Centauri Carbon sustain higher acceleration than Cartesian bed-slingers like the Bambu Lab A1 or Elegoo Neptune 4 Pro? The answer is moving mass on the Y-axis.
On a CoreXY printer, two stationary NEMA 17 stepper motors bolted to the rigid upper frame work together via synchronized GT2 belts to move a lightweight toolhead (typically 290g to 380g) along carbon-fiber rods or MGN linear rails. Meanwhile, the heavy heated build plate only steps downward along the Z-axis by 0.20 mm once per layer.
On a bed-slinger, the Y-axis stepper motor must sling the entire aluminum carrier plate, silicone heater pad, magnetic base, spring-steel PEI sheet, plus the growing mass of your 3D print back and forth thousands of times per hour. An empty 256×256 mm Y-bed assembly weighs roughly 1,150 grams. Add an 800-gram cosplay helmet at 220 mm height, and your Y-axis motor is flinging nearly 2.0 kilograms of high-center-of-gravity mass. To prevent layer shifts or tall parts detaching from the bed, slicers automatically scale down Y-axis acceleration on tall bed-slinger prints.
Input Shaping & Pressure Advance: Firmware Brains Behind the Brawn
Without advanced firmware compensation, accelerating a toolhead at 12,000 mm/s² produces two catastrophic print defects: ringing (ghosting ripples echoing after every sharp corner) and corner bulging (blobs at corners paired with thin walls mid-segment). Modern 2027 printers running Klipper or proprietary real-time DSP firmware solve both:
- Input Shaping (Resonance Compensation): Before printing, the machine vibrates its X and Y toolheads across a 10 Hz to 120 Hz frequency sweep while an onboard MEMS accelerometer logs the structural resonance peak (e.g., 54 Hz on X, 42 Hz on Y). During printing, the motion planner splits each step command into two slightly offset impulses separated by half a vibration period, canceling frame oscillation to zero.
- Pressure Advance / Linear Advance (
k-value): Molten thermoplastic inside a hotend acts like a compressible spring. When the toolhead decelerates from 300 mm/s to 20 mm/s for a corner, residual nozzle pressure keeps oozing plastic unless relieved. Pressure Advance (typicallyk = 0.018 to 0.032on direct-drive extruders) preemptively boosts extruder motor velocity during acceleration ramps and relieves pressure milliseconds before deceleration.
The Hidden Speed Bottleneck: Part Cooling & Minimum Layer Time
Even when you own a CoreXY machine with 20,000 mm/s² acceleration and a 36 mm³/s CHT hotend, you will frequently watch your printer crawl along at 45 mm/s when printing miniature figurines, narrow vertical pins, or the upper chimney of a 3DBenchy. This happens because of thermodynamic heat accumulation.
PLA leaves the nozzle at ~220°C, softens above its heat deflection temperature (~55°C), and remains rubbery above its glass transition temperature (Tg ≈ 60°C). If the nozzle returns to deposit Layer N+1 on top of Layer N while Layer N is still at 85°C, the lower layer deforms under the downward squish pressure of the nozzle, overhangs curl upward like potato chips, and fine details melt into an amorphous blob.
To prevent thermal collapse, every slicer enforces a "Slow printing down for better layer cooling" rule inside the filament profile (usually set to a Minimum Layer Time of 4 to 8 seconds for PLA and 8 to 12 seconds for PETG/ASA). If a small layer only contains 300 mm of extrusion paths, the slicer divides 300 mm by 6 seconds and forces the printer down to 50 mm/s. This is why printers like the Prusa MK4S (with its 360-degree high-static-pressure radial turbine blower) and Bambu Lab P1S (with its dedicated side-mounted 12W auxiliary part cooling fan) finish small and steep-overhang parts significantly faster than competitors with weak 4010 axial fans.
High-Speed Filaments vs Standard Filaments: Rheology Matters
Are "High-Speed PLA" (HS-PLA) and "Rapid PETG" spools worth buying, or are they marketing snake oil? In polymer science, high-speed filaments are genuinely formulated with a higher Melt Flow Index (MFI) and tailored molecular weight distribution. Standard PLA typically has an MFI of 6 to 8 g/10 min (at 190°C/2.16 kg), whereas High-Speed PLA uses shear-thinning flow modifiers to reach an MFI of 18 to 28 g/10 min. Read our complete material breakdown in the 3D Printer Filament Guide.
4-Step Max Volumetric Flow Calibration Checklist (OrcaSlicer)
- Open OrcaSlicer, click the top Calibration menu, and select Max Flowrate.
- Enter a start volumetric speed of
12 mm³/s, an end volumetric speed of35 mm³/s, and a step increment of1.0 mm³/s. - Print the serpentine test tower at your normal printing temperature (e.g., 220°C for PLA) and inspect with a digital caliper where the surface sheen turns matte or corners begin under-extruding.
- Measure the height
H(in mm) where the first defect appears, calculateMax Clean Flow = Start Flow + (H × Step), and multiply by 0.90 (10% safety margin) for your daily filament profile.
3 Real-World Numerical Case Studies: Speed vs Cost & Time
To prove how kinematics, volumetric flow, and cooling interact—and how they impact electricity and machine depreciation in our 3D Print Cost Calculator—we ran three distinct production jobs across three classes of 3D printers.
Case Study 1: Standard 3DBenchy Hull & Chimney (12.8g PLA)
A single 3DBenchy requires only 12.8 grams of filament, contains hundreds of tiny 3 to 15 mm segments, steep 40-degree bow overhangs, and a narrow 4-second-per-layer smokestack at the top.
- Legacy Bed-Slinger (50 mm/s, 500 mm/s², 12 mm³/s hotend): Takes 68 minutes (1.13 hours). Average power draw: 115W =
0.130 kWh($0.021 at $0.16/kWh). Machine depreciation ($0.10/hr): $0.113. - 2027 Budget Direct-Drive (Creality Ender 3 V3 SE at 180 mm/s, 2,500 mm/s²): Takes 28 minutes (0.47 hours). Average power draw: 145W =
0.068 kWh($0.011). Depreciation ($0.08/hr): $0.038. - 2027 High-Speed CoreXY (Bambu Lab P1S at 300 mm/s, 10,000 mm/s², Aux Fan ON): Takes 16 minutes (0.27 hours). Average power draw: 195W =
0.052 kWh($0.008). Depreciation ($0.12/hr): $0.032. Notice how the faster CoreXY printer consumes 60% less total electricity than the legacy printer because the heated bed only runs for 16 minutes!
Case Study 2: 240g Functional Mechanical Gearbox Housing (PETG)
This 165 × 140 × 85 mm industrial housing features long straight walls, 3 perimeters, and 20% Gyroid infill—meaning volumetric flow rate is the dominant bottleneck rather than minimum layer cooling time.
- Standard Hotend Profile (14 mm³/s Generic PETG): Max linear speed is capped at
166 mm/s. Total print time: 6 hours 42 minutes (6.70 hrs). Electricity at 160W avg =1.07 kWh($0.17). Machine time/depreciation at $0.15/hr = $1.01. - High-Flow Profile (24 mm³/s Rapid PETG on Creality K1C): Linear speed reaches
285 mm/son infill and inner walls. Total print time drops to 3 hours 54 minutes (3.90 hrs)—a 41.8% time reduction. Electricity at 205W avg =0.80 kWh($0.13). Machine depreciation at $0.15/hr = $0.59. Across a 50-unit production run, high-flow tuning saves 140 machine hours and $22.00 in overhead.
Case Study 3: Full-Plate Batch of 16 Gridfinity Bins (410g HS-PLA)
When printing 16 modular workshop bins on a 256×256 mm build plate, every layer has plenty of time to cool before the nozzle returns, eliminating the minimum layer time throttle completely and letting kinematics + volumetric flow run at 100% capacity.
- Bambu Lab A1 (26 mm³/s HS-PLA, 10,000 mm/s²): Completes the 410g plate in 5 hours 48 minutes (5.80 hrs), averaging 70.7 grams extruded per hour.
- Prusa CORE One with High-Flow CHT 0.4mm Nozzle (34 mm³/s HS-PLA): Completes the exact same 410g plate in 4 hours 35 minutes (4.58 hrs), averaging 89.5 grams per hour. For a commercial print farm billing $4.50 per machine hour (see our guide on how to price 3D prints for sale), that extra 1 hour 13 minutes per plate translates into 26% higher daily revenue per machine.
| Case Study Part | Filament Mass | Primary Bottleneck | Std Speed Time / kWh | High-Flow Time / kWh | Cost & Time Saved |
|---|---|---|---|---|---|
| 3DBenchy Boat | 12.8 g PLA | Layer Cooling & Accel | 28m / 0.068 kWh | 16m / 0.052 kWh | -42.8% Time / -23.5% kWh |
| Gearbox Housing | 240.0 g PETG | Hotend Volumetric Flow | 6h 42m / 1.07 kWh | 3h 54m / 0.80 kWh | -41.8% Time / -25.2% kWh |
| 16× Gridfinity Plate | 410.0 g HS-PLA | Pure Volumetric Flow | 5h 48m / 0.96 kWh | 4h 35m / 0.82 kWh | -21.0% Time / -14.6% kWh |
How to Optimize Your Slicer for True High-Speed Printing Without Failing
Want to shave 30% off your print times today without sacrificing mechanical strength or dimensional accuracy? Apply these four engineering rules in OrcaSlicer, Bambu Studio, or PrusaSlicer, and compare machine specs side by side in our Interactive Printer Comparison Tool:
- Keep Outer Walls Moderate (120–180 mm/s) While Pushing Inner Walls & Infill (250–350 mm/s): Outer perimeters dictate visual quality and dimensional accuracy. Keeping outer walls at 150 mm/s ensures uniform gloss and sharp corners, while letting inner walls and Sparse Gyroid/Adaptive Cubic infill run at the volumetric flow ceiling saves 85% of the available time.
- Bump Nozzle Temp by +5°C to +10°C Above Slow Profiles: At 25+ mm³/s, filament residence time in the heater block is under 1.8 seconds. Raising PLA temperature from 210°C to 220°C–225°C lowers melt viscosity and restores inter-layer bond strength.
- Use Arachne Wall Generator + Inner/Outer/Inner Order: Printing the inner wall first gives the outer wall a solid anchor to bond against during high-speed cornering, preventing overhang separation on curves.
- Measure Real Wattage with a Smart Plug: Plug your printer into a power-monitoring meter and input your real average wattage and print duration into our 3D Print Cost Calculator to see your exact cost per hour.
*Pricing Note: All dollar figures listed in our 2027 guides represent estimated manufacturer reference MSRPs or measured lab electricity/filament averages at the time of testing. Click any Amazon button to verify live pricing and stock.
Frequently Asked Questions (2027 FAQ)
Why does my 500 mm/s 3D printer only print outer walls at 200 to 300 mm/s?
Three physical bottlenecks restrict real outer wall speeds: hotend volumetric melt capacity (measured in mm³/s), surface gloss uniformity across acceleration ramps, and minimum layer cooling time. Printing outer perimeters above 250 mm/s often causes matte-to-glossy sheen shifts where the nozzle decelerates into corners, plus overhang curling if molten polymer cannot solidify.
What is a realistic 3DBenchy print time on a modern 2027 3D printer?
Following official SpeedBoatRules (0.20 mm layer height, 2 perimeter walls, 10% infill, 3 top and bottom layers, and standard 0.4 mm nozzle without geometry modification), modern CoreXY and linear-rail bed-slinger machines complete a clean, dimensionally accurate 3DBenchy in 13 to 17 minutes, compared to 60 to 75 minutes on legacy bedslingers.
Does printing at 350 mm/s make 3D printed parts weaker than printing at 60 mm/s?
Yes, if you print too fast for your hotend heater core. When filament races through the melt zone near its maximum volumetric limit, the outer skin melts while the inner core stays 15°C to 25°C cooler, reducing inter-layer polymer chain entanglement by up to 35%. Raising nozzle temperature by 10°C or using High-Speed PLA restores strength.
How does Input Shaping eliminate ghosting and ringing at high acceleration?
Input Shaping uses an onboard MEMS accelerometer to measure the resonant natural frequencies of the X and Y axes (typically between 38 Hz and 75 Hz). The firmware then applies a Zero Vibration (ZV) or Multi-Hump Extra Insensitive (MHEI) command filter that cancels out frame vibrations before they appear as ripples on your print.
Does a 0.6 mm nozzle print faster than a 0.4 mm nozzle on high-speed printers?
Only if your hotend has surplus volumetric flow capacity or you reduce perimeter wall counts. If your hotend is already maxed out at 24 mm³/s with a 0.4 mm nozzle, switching to a 0.6 mm nozzle at 0.30 mm layer height simply forces the slicer to reduce linear travel speed to stay within that same 24 mm³/s ceiling.
Does high-speed printing use more electricity per print or less?
High-speed printing draws higher instantaneous power (220W to 310W vs 120W on a slow printer), but consumes 25% to 38% fewer total watt-hours (Wh) per finished part. Because the heated build plate accounts for roughly 65% of a printer’s energy draw, finishing a print in 2 hours instead of 5 hours saves massive bed-heating energy.
Related 2027 Guides


Calculate Your True Cost Per Print
Model filament weight, multi-color AMS purge waste, local kWh electricity rates, and Etsy profit margins in our interactive calculator.